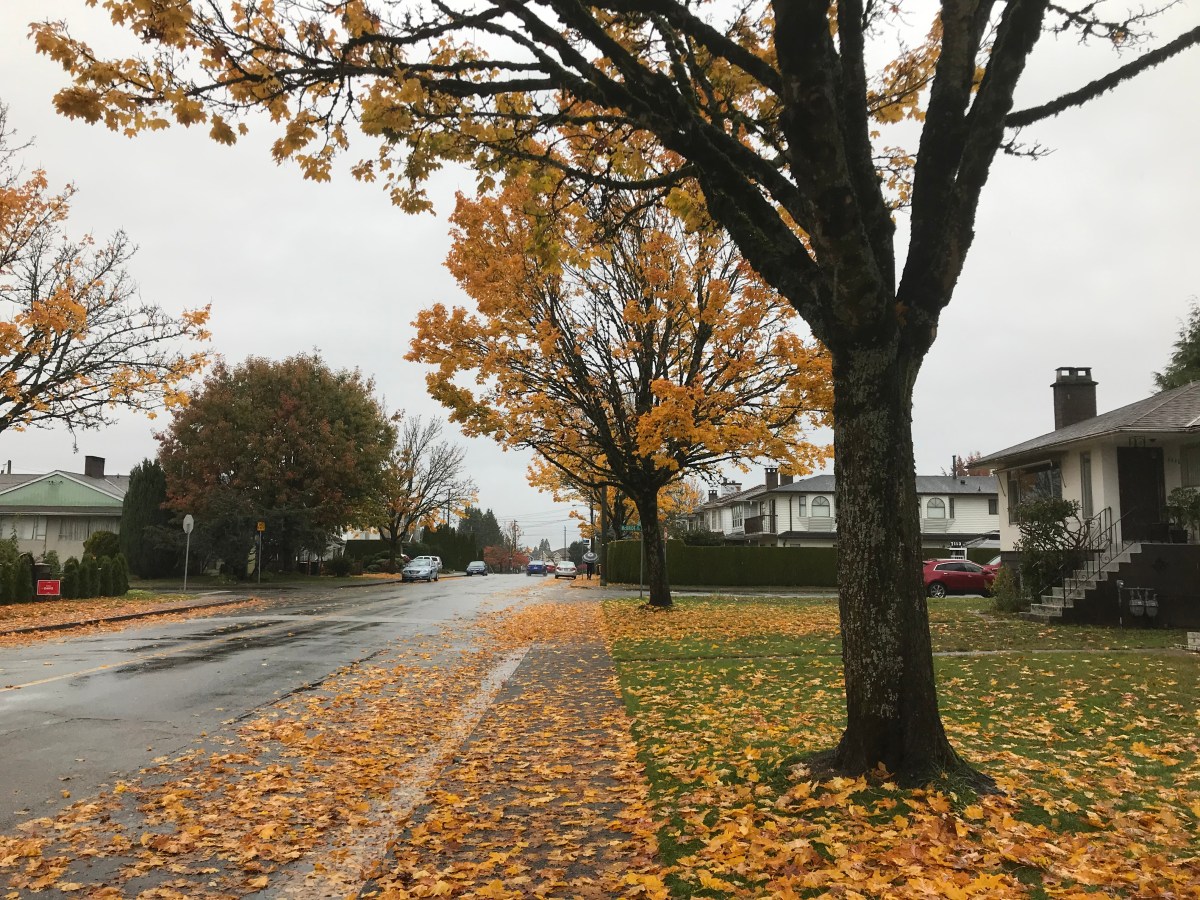
A few photos captured with my iPhone 7 during my walk home from voting in the rain. Some nice fall colours to be seen before all the leaves fall off the trees.

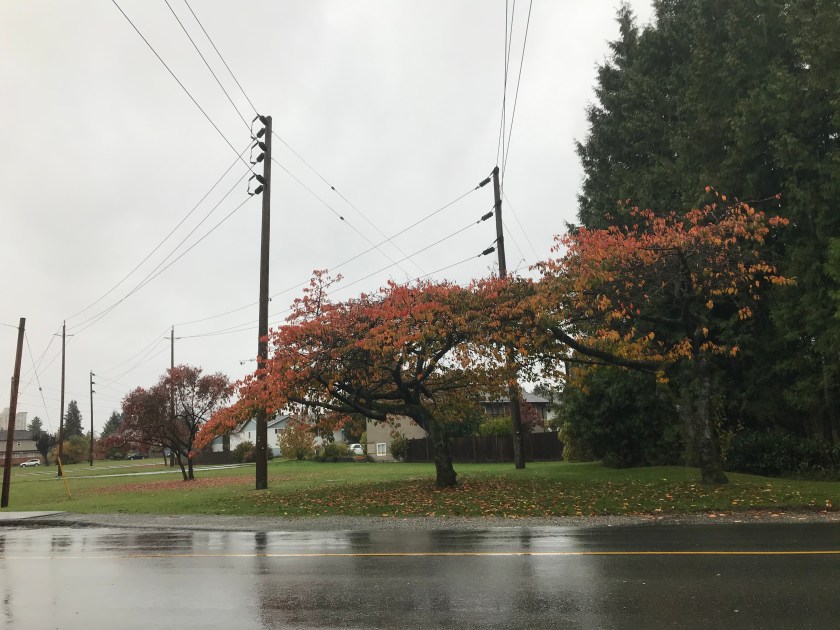

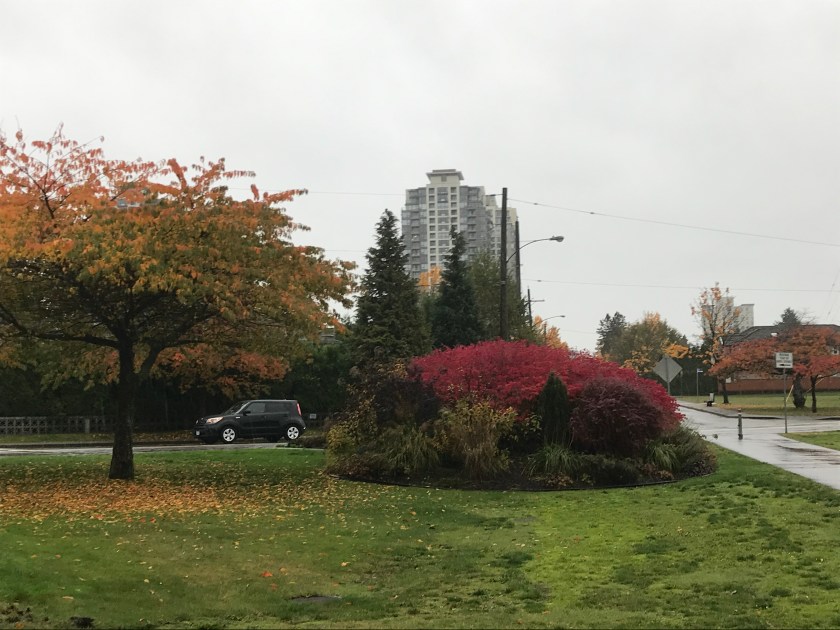

A few photos captured with my iPhone 7 during my walk home from voting in the rain. Some nice fall colours to be seen before all the leaves fall off the trees.
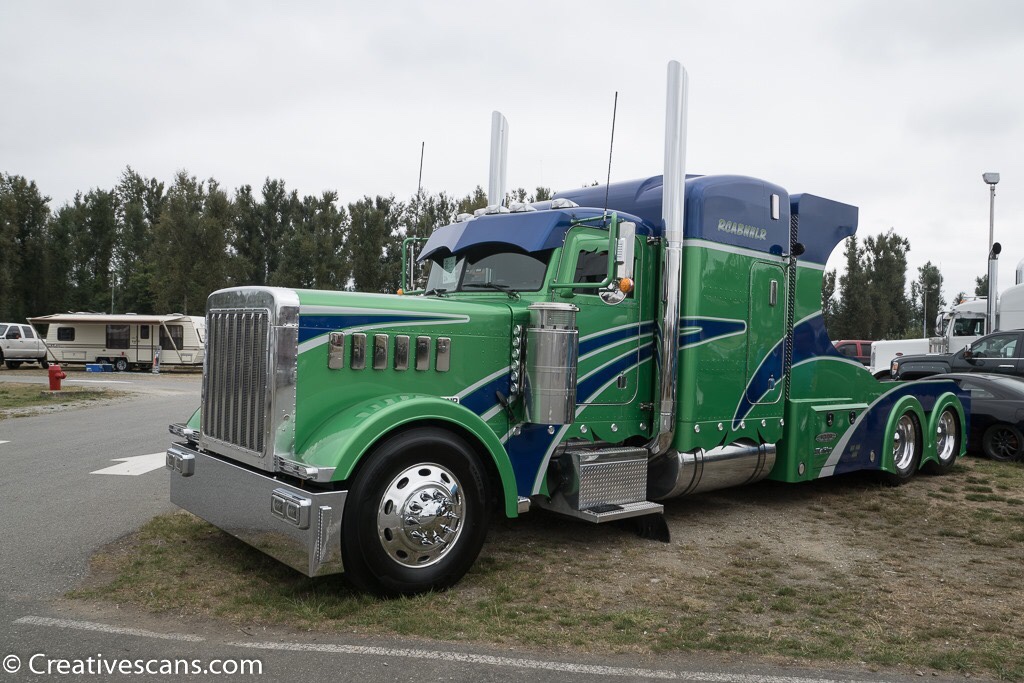
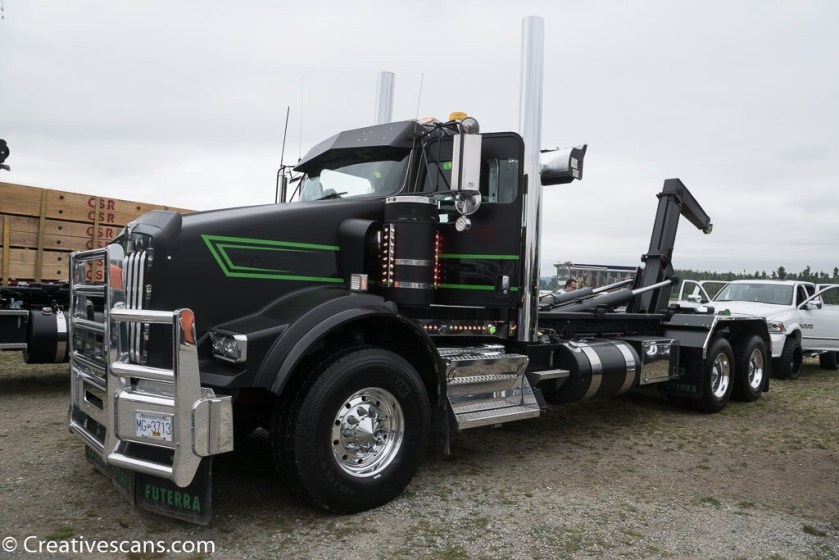
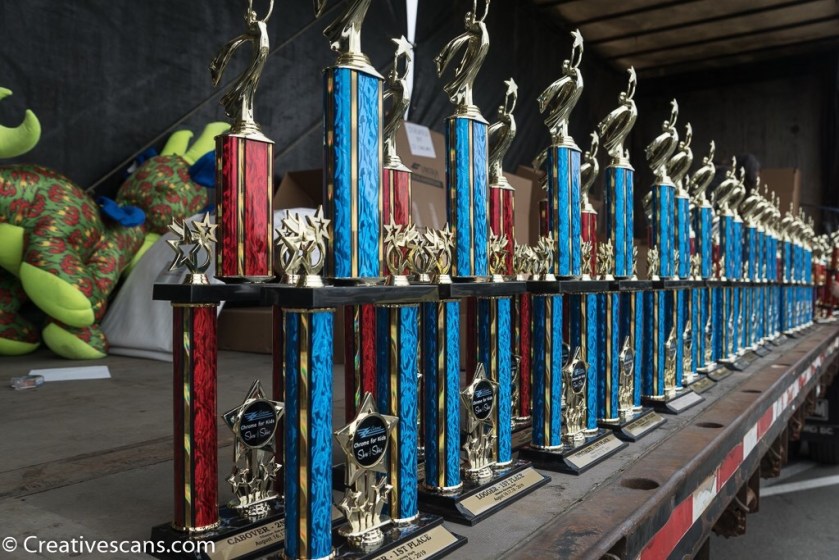
Some photos from the ZZ Chrome for Kids Truck Show & Shine at Mission Raceway


Here are a couple of photos taken 2 minutes apart during sunset. Light changes quickly especially at sunrise and sunset. Be ready to capture your images and focus on different areas of the scene.


Photography tip: When taking photos through glass get as close as possible to the glass to reduce glare. Camera lens was almost touching window glass. Make sure flash is off. Photo of the ems truck taken through glass after sunset.


Saturday was a very cool day. I met the legendary photographer Fred Herzog who is well known for his street photography around Vancouver.
There was an opening event for an exhibition of some of his work at the Equinox Gallery in Vancouver and Fred himself was there.
I was lucky enough to speak with him for a few moments about his work. Specifically I asked him about his images taken at night. There are fewer night images of his out there and I asked if he approached night time images differently than his daytime work. He didn’t get into the technical side of things but told me he didn’t do as many night time images because after a long day working he simply hadn’t the time and energy to go out shooting in the evenings.
I was thrilled to have my photo taken with him (even if my eyes are party shut in the photo haha). He suggested we take the photo in front of the gallery promo sign.
Award winning Canadian photographer Lincoln Clarkes was also at the Fred Herzog exhibition opening. I have seen some of his work and also saw a documentary about him on Knowledge Network so it was cool to meet and chat with him for a few minutes. There is a photo of he and I together as well…he is very tall.
I included a few overview photos of the event as well. It was well attended.


Here are a few quick tips when trying long exposure photography at night or during the day.
Use a solid tripod. A shaky tripod leads to blurry photos.
Set up the tripod on a solid surface. Solid ground or concrete or similar are best. Beware of setting up in sand or loose soil because the tripod legs can slip and move. Also be careful on bridges…they can shake when cars or trucks drive by or when people walk by.
If you have a UV filter on the lens you will be using take it off. You can sometimes get unwanted light reflections bouncing around between the filter and the front glass of the lens that can show up in your photos.
Turn off noise reduction. This is optional but I do this when photographing fireworks. If left on it slows down the in camera processing of photos which means waiting to take your next image.
Shoot in RAW. This gives you the best image possible and gives you the most control when editing your photos. Then save your image as a jpg when you want to share or upload your final image.
Use a remote cable to reduce camera shake. If you don’t have a cable release use the self timer available on most cameras. Using the self timer gives the camera time to settle before the shutter action.
Below are are a few examples of long exposure photography. All of these long exposure photos were done without the use of ND (neutral density) filter. I will write about them and that technique of long exposure photography another time.


I recently attended the first of three YVR 2037 Master Plan Workshops at YVR. I view the 2037 Master Plan mainly from a plane spotter/aviation enthusiast point of view with an interest in the airport providing more plane spotting amenities. Here are a few thoughts:
The YVR Master Plan and workshops cover more than just plane spotting. They cover 6 key components; terminals, airside and airspace, ground access, environmental, amenities and land use. Creating new plane spotting areas touches on several of these areas. The airport had many top level people at the session actively involved in the discussions including Craig Richmond CEO of the airport, as well as people in charge of or with solid knowledge in the above 6 key areas. There were about 6 groups of a half dozen or so people in each group participating in the workshop. If we had questions, most if not all, got answered. If questions couldn’t be answered on the spot they would follow up at a later time. No concrete time lines are in place for any of the topics covered. These are sessions to discuss ideas for the near and medium future and give feedback about current and future aspects of the airport. The discussion guide is an interesting document to read. It can be found here:
http://www.yvr2037.ca/our-futurist/documents/3856/download
Plane spotting is specifically mentioned on page 27:
“Plane Spotting Platform: Design and construct a viewing area, just west of the Canada Post building, including parking, path and a covered plane spotting deck.”
And here:
“Plane Spotting Platform: Design and construct a plane spotting platform in the grassy area just north of the jetSet parking lot and west of the future North-South Taxiway.”
When plane spotting was brought up in our group here is some of what was brought up:
Provide a shuttle or some other means of transport to get to and from the spotting locations. Dedicated shuttle similar to the south terminal shuttle, or transit or maybe partner with the Canada Post Shuttle (that runs almost empty most parts of the day).
Connect spotting locations with bicycle paths and other Sea Island amenities.
Make the spotting locations camera friendly (no chain link fencing or glass to shoot through)
Have a covered area included in the spotting location.
Include toilet facilities at the spotting locations.
Put in a sidewalk to Larry Berg Flight Path Park from BCIT.
There is another opportunity to get involved and learn more about the future at the airport at the upcoming open house on Wednesday October 12, from 4pm to 8pm. It is being held at the Observation Area in the Domestic Terminal at YVR.
It was an interesting event to attend. Below are a few photos taken at the event. And here is a link so some of my aviation related images: https://www.flickr.com/photos/zorro1968/albums/72157646707011000


One of my two horses Merlot, number 3 in the photos, ran this past holiday Monday. It didn’t start as a close race with the field strung out in a line, but the end of the race added some excitement in seeing who would come in 3rd and 4th. A win would elude us this day and we would finish a very close 4th. That’s racing.


I like photographing all types of events but I really enjoy sports photography. Partly because I am a sports fan and partly because sports photography is challenging in its own way.
I wanted to photograph the Gastown Grand Prix bicycle races earlier in July but missed them. I didn’t see any commercials or interviews on TV about the event or see anything about the races on the social media channels I follow…Twitter or Facebook. Lesson learned. Luckily for me there was another set of cycling races 2 days later on Friday in Poco (Port Coquitlam) as part of BC Super Week.
On Thursday evening I went through my usual routine of making sure my gear is ready for a full day of shooting. I clean all my lenses (both ends) and make sure the camera sensor is clean. I also make sure all my batteries (4 of them) have a full charge. And I decide which lenses and other accessories to bring with me to an event.
The night before (or earlier) I also check information about the event. Where is it exactly, when does it start and when does it end.
I try to get to the event early so I can see the layout and figure out where I want to shoot the event. For a cycling event I try and get images from multiple locations around the track. Corners can be a great spot to get images of the cyclists leaning into the corner. Accidents are more common at the corners of bicycle races so there is a chance you may get images of a racing mishap as well.
As far as camera settings go, I used a variety of settings depending on a lot of factors. For the shots of cyclists at the start line (not moving much, if at all) I used full manual settings. For shots of the cyclists during a race I used full manual trying to get the fastest shutter speed I could. This meant higher ISO as the day went on and the light started to fade, larger aperture (smaller f number) to get a faster shutter speed (bigger number). For some shots I also tried to drag the shutter slowing it down to a longer exposure to blur the image to try and convey a sense of speed.
I also set the camera to “shutter priority” during some parts of the races. Set your focus priority (continuous) and ISO and the shutter speed you want and the camera takes care of the aperture for you. This comes in handy when you don’t have time to change settings when conditions or what you are shooting is constantly changing.
So there you have a few tips on photographing a sports event. Enjoy!


If you missed the fireworks on Canada Day or July 4 or want try your hand at photographing fireworks you have another chance during the http://hondacelebrationoflight.com/ in the Vancouver area July 23, 27 and 30th.
So here are some basic tips on how to photograph fireworks.
Try to scout out your location before the event. Know where the fireworks display will be and where you will shoot in relation to that location. Finding a location that will give you an unobstructed view of the fireworks is key. With popular fireworks shows there will be A LOT of people at the event so plan for this. You do not want to set up in a spot nice and early only to have people end up in front of you blocking your view. And it is best to get into your position as early as possible. I usually try and be at my spot at least 3 hours prior to the show starting.
As far as gear is concerned I use a Sony A77ii DSLR but you could use a point and shoot camera with manual settings or a “Fireworks” setting. No matter what camera you use, it is best to have and use a good sturdy tripod. The shutter stays open for relatively long periods of time when shooting fireworks and if you try to hand hold the camera you will end up with blurry pictures. Using a sturdy tripod can help eliminate camera shake and blurry pictures.
If you can, use a cable release to activate the shutter to take the photos. If you do not have a cable release or the camera does not support a cable release then use the self-timer function to activate the shutter. Using a cable release minimizes how much the camera moves to activate the shutter…your finger doesn’t touch the camera it touches the cable. Using the self-timer gives the camera time to settle down after your finger pushes the shutter button. Many cameras have a self-timer function that lets you delay the shutter by 2-3-4 or 10 seconds. I have used the 2 second delay with good results when I have forgotten the cable release.
The camera settings that I find work best for photographing fireworks are pretty straight forward. Most often I use shutter speeds of between 2 and 6 seconds, an aperture of between f7 and f11 and ISO of between 100 and 400. You will need to play around with the settings to see what works best for you and your situation but these settings can be used as a decent starting point. I will change camera settings during the show if segments of the show are brighter or less bright to try and get the best results but don’t get carried away with changing settings during the show.
Next tip. Shoot a lot. Especially when you are starting out. Don’t expect all your photos of a fireworks display to be award winners. If you take more photos you increase the chances of you getting some really pleasing images. Like anything else, if you keep at it and do it enough you will find that you will have more and more good images from each display you photograph.
A few words about composition. You can focus tight on the fireworks and that is perfectly ok or you can try and add other elements to the composition to try and give the photos a sense of place. If you add in your city skyline or maybe a prominent building or bridge to the fireworks photos it can really add something special to the final photograph.
There are other more “advanced” techniques to photographing fireworks but I hope these few tips help you’re your next fireworks photos a little better. Below are a few fireworks photos I have taken over the years.